This post may contain Amazon® product affiliate links. We may receive a commision if you make a purchase after clicking on one of these links but at no cost to you. Please visit Our Disclosure Page for more information. Thank you.
It is a lot of hard work when you take time to decorate your office or any room. You need to come up with a concept or a motif for the interior and there are a lot of things that need to be placed in perspective. They include colour, theme, furnishing and others. The one thing that improves your interior décor is curtains. They add character and have tons of useful functions in a residential home.
They improve a room in three ways:
- They help to block the rays of the sun keeping the room dark. The blackout curtains are woven with extra tight fabric that prevents light from passing through.
- Minimizes outside noise. The high quality fabric is practically soundproof, blocking 40% to 50% of outside noise.
- Acts as an insulator by ensuring that the room stays warm during the winter as well as preventing fresh air from escaping during the humid days of summer.
Today, you will find different styles of the blackout curtain and each can be hanged and decorated differently. In order to properly install the blackout curtains you need curtains rods, tape measure, brackets, screws, a level, drill, magnetic strips and drapery hooks. When you have assembled the above tools and materials you can begin installing the curtains. Here are some steps to help you with the installation.
Step One – Position the rod
You need to place the rod on a suitable spot. Place the rod a little higher in order to make your window appear longer. Consider the width of the window as it will help to improve the appearance as well as make the window appear wider. What you need to know is that your rod should be slightly wider than your window. This will allow the curtain to cover the window well with a bit of slack on both sides.
Step Two – Install the bracket
Begin by marking spots on your wall where you will place the brackets. You need to align the marks properly by using a level. Make the necessary adjustments. Ensure that you have positioned the marks correctly and then drill holes in place of the marks. Proceed to place the brackets on the wall and screw them in. Once you have done so you need to make sure that they are firmly screwed in.
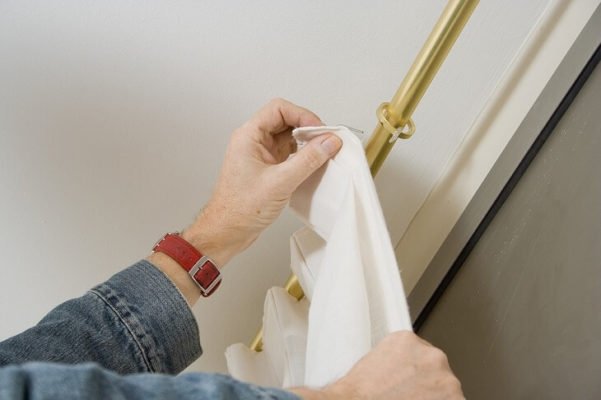
Step Three – Hang your curtains
Take your curtains and using one end thread the rod through the rings carefully. Some curtains come with hooks which means you have to slide the rod through them. Others have a pocket where have to do the same. Once you are done you need to attach the rod to the brackets. Make sure that your curtain is facing the right side. That is, the front side with prints and designs should face the room while the back side should face the window.
There are curtains with a traverse rod in which to hang curtains from. This means that you need to use the supplied drapery hooks. For the tab top curtains attach the curtain manually using the hooks.
It is a common style for people to hang curtains separately from the blackout panels. If this is your style you should follow the instructions laid out earlier. Just before you hang them spread them on a flat surface like a table.
Attach the drapery hooks and make sure they are spaced evenly. Place the panels on top of the curtains and check the insides for a looped thread. You have to then line this up with the hooks. Attach the magnetic strips just before attaching the hooks and once the edges are lined up put it on the rod and hang them on the brackets.
There are blackout curtains, especially those with separate panels, which come with an instruction manual. This provides instructions on how to attach and install the curtains. Want to learn more? Here is a list of the best blackout curtains according to reviewers.